Setting up popUP Email Automation with Microsoft Office 365 is straightforward when you know where to click. Once configured, you’ll be able to send bulk emails effortlessly, saving hours of time. In this guide, we’ll break it down step-by-step, following the instructions from the configuration screen.
Step 1: Access the Azure Portal
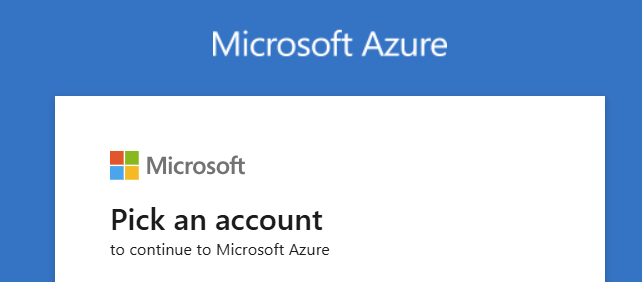
Start by logging into the Microsoft Azure Portal with your Office 365 credentials. Use this link to log in: https://portal.azure.com.
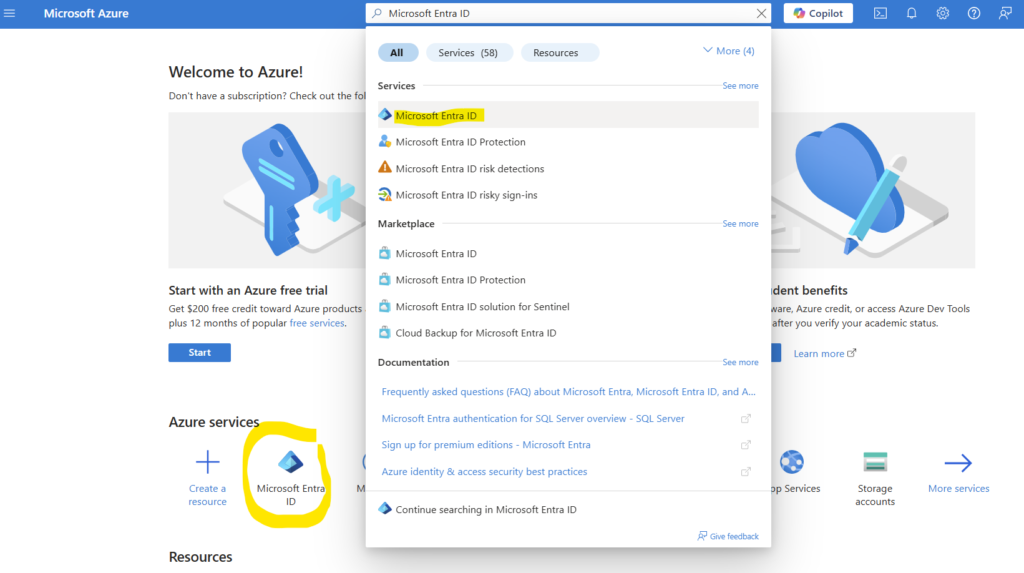
Step 2: Navigate to ‘Microsoft Entra ID’
Once logged in, search for “Microsoft Entra ID” in the search bar at the top of the portal. Click on the result to open it.
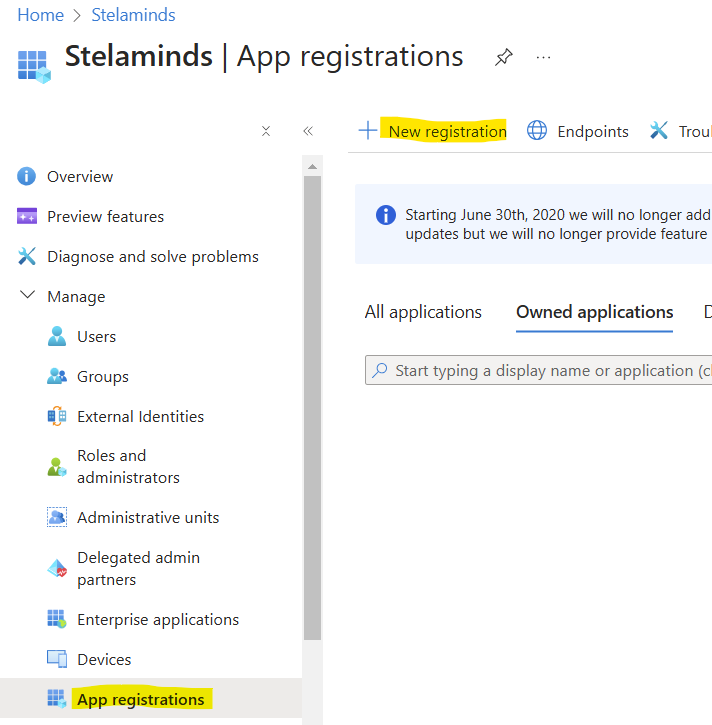
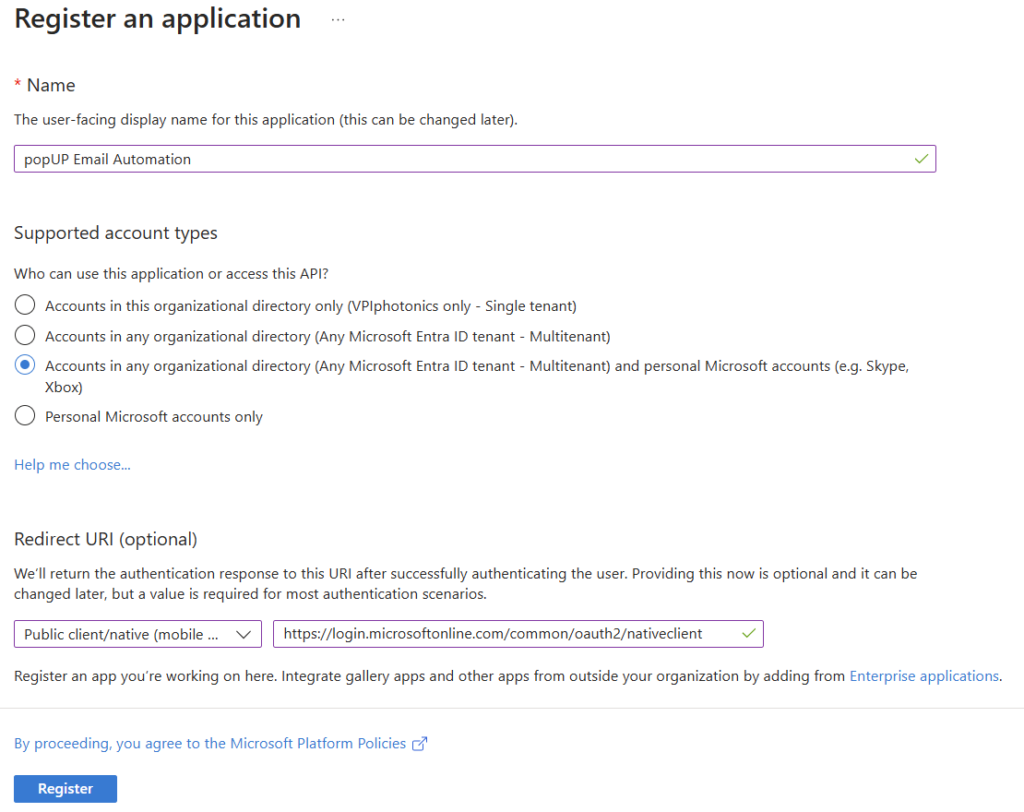
Step 3: Register a New App
- Click on App Registrations in the left-hand menu.
- Click + New Registration.
- Fill out the form:
- Name: Enter something like “popUP Email Automation.”
- Supported Account Types: Select Accounts in any organizational directory and personal Microsoft accounts.
- Redirect URI: Set this to Public Client/Native and input:
https://login.microsoftonline.com/common/oauth2/nativeclient
- Click Register.
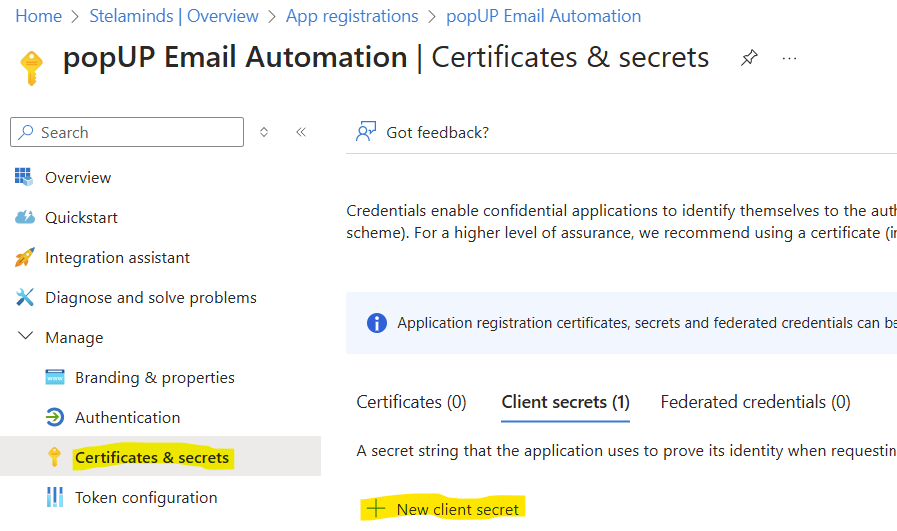
Step 4: Add a Client Secret
- Go to Certificates & Secrets in the app menu.
- Click + New Client Secret.
- Add a description (e.g., “popUP Secret”) and set an expiration (e.g., 1 year).
- Click Add and copy the generated secret. Save this secret somewhere safe, as you won’t be able to retrieve it later.
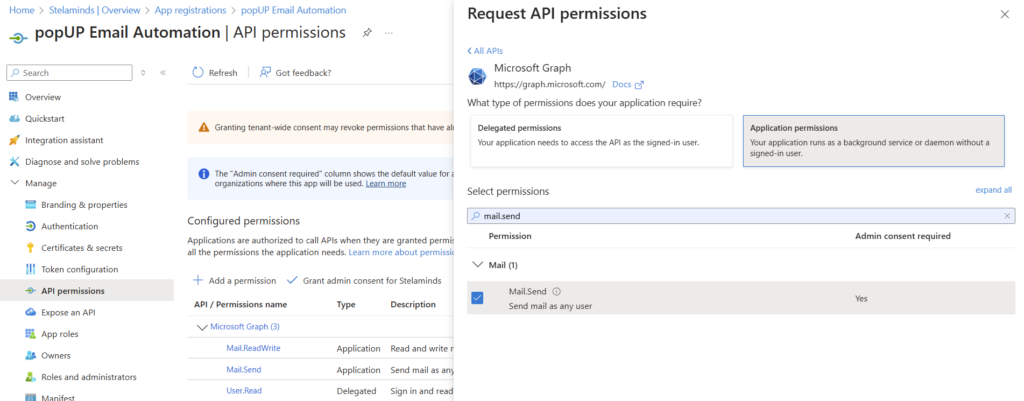
Step 5: Assign API Permissions
- Navigate to API Permissions in the app menu.
- Click + Add a Permission -> Microsoft Graph -> Application Permissions.
- Search for and add the following permissions:
- Mail.Send
- Mail.ReadWrite
- Click Grant Admin Consent to finalize the permissions.
- Click + Add a Permission -> Microsoft Graph -> Delegated Permissions.
- Search for and add the following permission:
- User.Read
- Click Add Permissions to finalize the permissions.
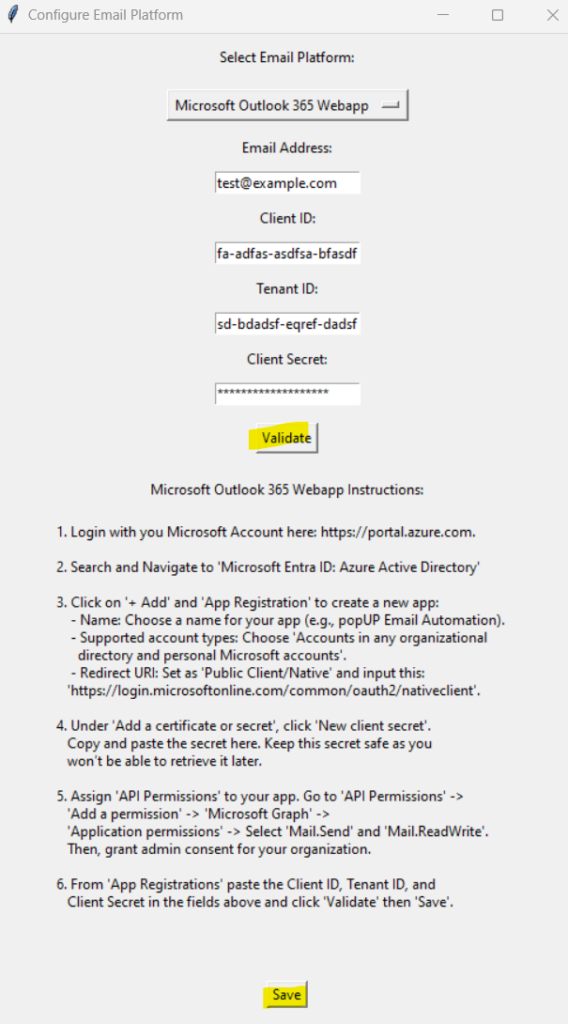
Step 6: Configure popUP Email Automation
- Open the popUP Email Automation app.
- Navigate to the Email Configuration tab.
- Select Microsoft Outlook 365 Webapp from the dropdown menu.
- Fill in the required fields:
- Email Address: Your Office 365 email.
- Client ID: Found under the app’s Overview in Azure.
- Tenant ID: Also found under the app’s Overview in Azure.
- Client Secret: The secret you saved in Step 4.
- Click Validate to test the configuration.
- Once validated, click Save to finalize the setup. You’re now ready to send bulk, personalized emails through Microsoft Office 365 using popUP.